
Bespoke Patchwork Skirt pattern — Additional information for waistband channel:
I need to add the following information to the pattern instructions. In the meantime, here is some information that isn’t clear from pages 10-12 of the pattern instructions. I’m so sorry!
“In the center of the waistband where you have determined the back of the skirt, choose one seam to unpick the stitches with a seam ripper. Open the seam from the waistband seam to the paper-bag-edge topstitching so the elastic will fit in the waistband channel. See waistband diagrams on page 11 for detail.”
If you have any other questions, please contact me at annie@anniesmith.net.
Bespoke Patchwork Skirt pattern – Little Girl Skirt Instruction adaptation
For the Little Girls Skirt, here’s how I make them now, to give them more “twirl appeal”:
Follow the layout for an adult skirt – but you’ll use more mini-charms per row as the adult pattern calls for.
Example: if you’re following the Adult Small directions to make one for a size 4 —
It calls for 10 squares. Use 15 to start the first row..
The next row, use 20
the next row, use 25
the next row, use 30 – and so on, if you’re going to add another row to make it longer.
So increase by 5 mini charms for each row.
You’ll make it fit perfectly when you insert the elastic. Use 3/4” elastic for the waist on these. You may want to use a 2 1/2” strip of fabric for the waistband, rather than using the mini-charms. I’ve done both and I’m happier with the strip of fabric, as the mini charms can be a little fiddly when you insert the elastic.
Half-Square Triangle Supplement
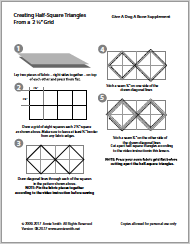
To download this file, right-click the image and select “Save file as…”.
Here is a correction — or additional information for Love is Spoken Here:
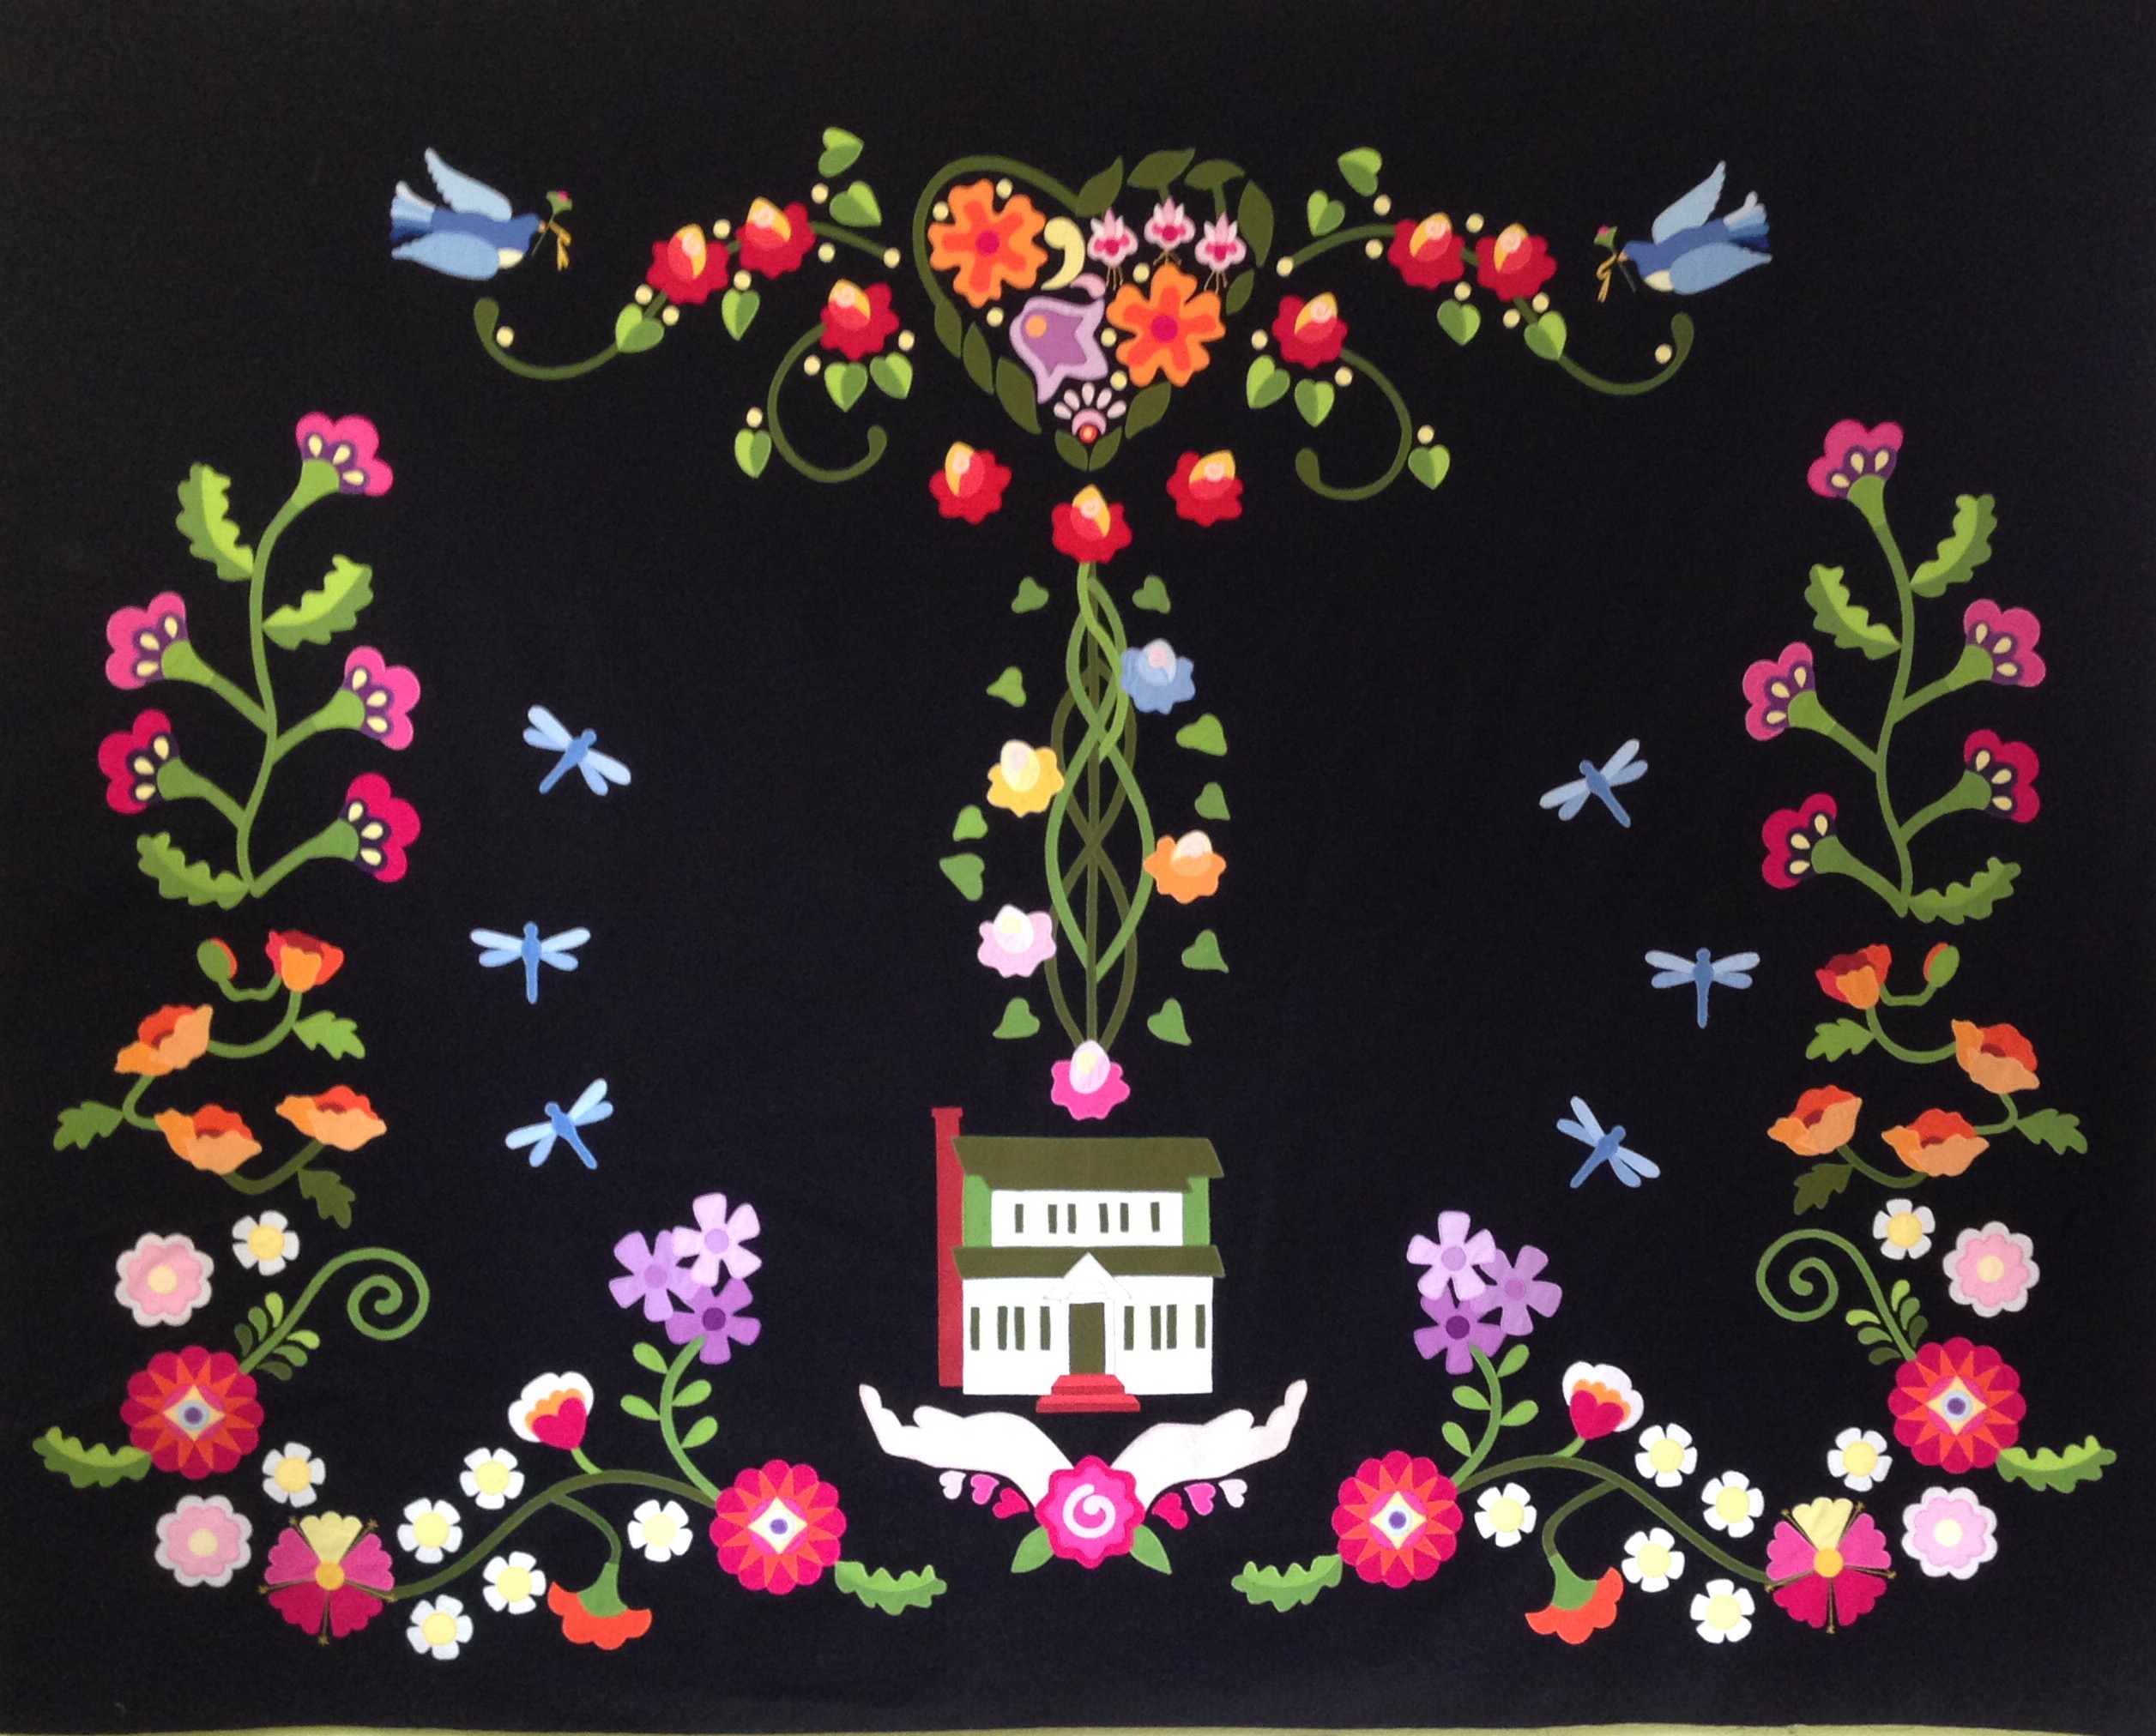
Under Joining the Panels on Page 9:
Trim each panel only to straighten the edges of the fabric, as they misshapen slightly due to the stitching process. Each panel should measure the exact same length (for example: 38” long). The width may also vary— for example: 23 3/4” wide. Whatever that measurement is, as long as you haven’t trimmed the Banner piece, everything will fit.
The last sentence of the Joining The Panels section is missing the details for trimming the Banner piece.
Before trimming the Banner piece to size to add to the top of the panel section, measure the panel section in the center of the panel (19” from the top edge) — measure from side to side and write your measurement here _____________”.
Whatever that measurement is, you will need to trim the banner to size. For example, if the finished sewn and stitched width of the panels equal 72”, trim the banner on each edge equally so it measures 72” to match the panel section. If your measurement for the panel section is less, trim the banner to that measured size.
Trim the top and bottom edges of the banner so they are straight, in preparation for sewing the Banner to the Panel section.
** Your quilt’s dimensions may vary from the size noted on the pattern. The pattern was written for the quilt size to be 59” long by 72” wide. My finished quilt (The cover quilt) size is 57 1/2” long by 70 1/2” wide because I trimmed the edges and squared it up after it was quilted and before I added the binding.
Please let me know if you have any questions about any part of the pattern. Thank you!
Information for Monkey Business pattern:

There is a mistake in the pattern.
Before cutting your fabric, please email me at annie@anniesmith.net. I have a pattern correction for you.
If you have already cut your fabric, please email me at annie@anniesmith.net. I have a pattern correction for you and additional background fabric.
Cutting Instructions – Pickle Road Garden
Here is a PDF containing the cutting instructions for the Pickle Road Garden quilt — in case you didn’t get them in the pattern.