Creative Spaces Blog Hop, Week One, Day 7
Hi y’all! Today is my day to share, and I’ve decided to change things up a little bit.
I want to show you where I started in my organizational process. When we moved to a new home with an attached studio space, it took me awhile to get organized. Like, two years, in fact — because I was traveling to teach so much that I was barely home.
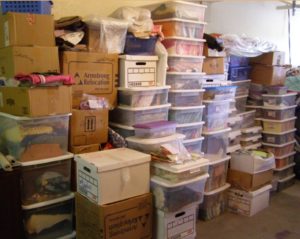
This is how things were moved in and how they stayed until I decided to take matters into my own hands while BigGuy was on a business trip:
This, my quilting friends, is 87 boxes worth of fabric of some kind. It does include some home dec and dressmaking fabrics, but the lion’s-share is for quilting.
Do you see where I might have a problem?
There are so many paper boxes that you can’t see through, how would I ever know what’s inside?
The clear boxes are all beautifully folded and organized by color, but they provide a problem as well. I would go looking through those clear boxes to find a fabric that “I know I have in there” and invariably, I would find it in the bottom box. Then, after I retrieved it and put all the boxes back in the stack, I would be too tired to sew. Those things are HEAVY!
So, what would you do instead?
If you answered, go to the LQS (local quilt shop) and buy the fabric instead of going through those boxes, you would be so right. That’s the best way to grow your stash!
Soooooo…
I decided to go through each box and cull out everything I didn’t want, refold every piece that I did want to a uniform size, and store them in a new shelf unit.
I opted for a modular IKEA unit, Ivar, so I could build exactly what I wanted without breaking the bank. (I love IKEA for this!) My shelf unit has a row of glass doors, open shelving and solid wood doors — 108″ wide and 84″ high and 14″ deep. I could make that smaller if I wanted, or wider, depending on my needs and space defines.
I went through all 87 boxes, touching each fabric five times. It takes five times to:
• Remove it from the box
• Decide if you’re going to keep it, sell it, or give it away
• Refold it
• Arrange the stacks of like-colors
• Put it away on the shelf
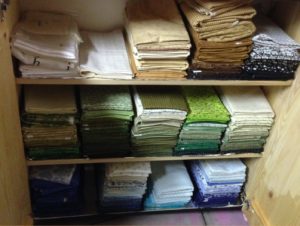
Here is what one shelf of Green fabrics looks like:
I make five stacks across a shelf and separate the Greens by color families: true green, blue green, yellow green, gray green and brown green. Then I stack them from light to dark in descending order. These greens are all 1/2 yard or larger.
I did that for each color of solids, monochromatic prints and predominant color fabrics. I had a collection of novelty prints, baby fabrics, christmas themes, civil war collections, etc. and shelved them with their own groups. I also have an assortment of fabrics that are 4+ yards or more for backings that I shelved together.
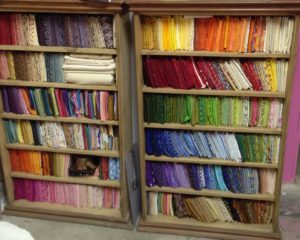
Then, I have my fat quarter collection:
I fold my fat quarters into the size of CD jewel cases and then arrange them in some repurposed CD shelves, that, well — used to house our DJ CD collection. The shelves are so perfect for this use, I just love them. The shelves are open for me to pick whatever I want from them, shopping in my own stash – which is much more convenient that pawing through heavy boxes.
I’ll share much more of my organizational tips and tricks with you over the next few weeks. In the meantime, for this week, I’m going to offer a prize to you.
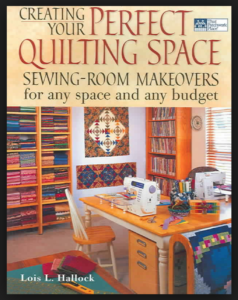
A copy of my favorite organizational book:
and the Studio Planner to go with it.
To be in the drawing, click here to go to my Instagram page AnnieSmithQS
Follow me there, like the post and link a friend.
I’ll choose the winner next Sunday, July 22 and announce the winner on Instagram.
In the meantime, Happy Quilting !!
©2018 Annie Smith All Rights Reserved
